Step 1) Print your template (optional) or draw the head and tail of a mammoth on a piece of paper. Cut around it leaving a lip (Ask an adult for help!) and glue it to the cardboard.
Step 2) Paint the mammoth pieces with your favourite colours! Or leave them blank to colour them at the end!
Step 3) Make a cut in the middle of the lip and bend each side going opposite directions. Leave your pieces aside!
Step 4) Take the cup and wrap a piece of paper around it. Make a mark and cut the excess paper (Ask for help!)
Step 5) Glue the paper to the cup. Now you have a blank canvas!!
Step 6) Take your head and tail and position them on the cup. Glue them to the cup when you find a spot you like.
Step 7) Leave the cup aside. Use the ruler to measure strings of approx. 10cm from the wool and cut them (Ask for help to cut them!). You will need quite a pile!
Step 8) Divide your cup into two sections (top and bottom). Cover a small section of the paper with glue and start sticking the strings of wool next to each other. Keep adding glue as you go along!
Step 9) Keep adding glue and wool until both sections are covered. Make a ball with a piece of paper and stick it to the top of your cup.
Step 10) Cover the ball with glue and stick strings of wool until you cannot see the paper. If the bottom ends are too long you can shorten them a little! (Ask for help!)
Step 11) Try thinking of fluffy and woolly animals and make your own!
We’re also welcoming visitors back to the Museum with our FREE Make & Take workshops this summer, booking essential! See our future dates and booking details below:
Step 1) Draw a fluffy animal on a nice background and go over it with a black marker
Step 2) Colour your drawing but leave the animal blank
Step 3) Arrange the cotton to fill the body of the animal
Step 4) Glue the cotton wool using your glue stick
Step 5) Fill the bottom of your drawing with the cotton wool and glue it. It looks like grass!
Step 6) Gently paint the cotton wool
Step 7) Glue your drawing to a piece of cardboard of the same size
Step 8) Using a pencil make holes at the top corners, pass the string through them and tie it.
Step 9) Think of different animals and backgrounds!
We’re also welcoming visitors back to the Museum with our FREE Make & Take workshops this summer, booking essential! See our future dates and booking details below:
Step 1) Draw squares of 2×2 on your squared paper. Leave a separation between squares of 1 small square.
Step 2) Leave your template aside. Take your cardboard and draw lines of 1cm apart. You can skip to Step 7 if you don’t want to do this.
Step 3) Cut all the lines you have drawn (Ask an adult for help!). You will end up with many 1cm sticks.
Step 4) Take the sticks and measure squares of 1 cm. Cut them using the scissors. (Ask an adult for help!)
Step 5) You will have a pile of 1cm small squares that would fit perfectly on the squares drawn on the paper.
Step 6) Use the glue stick to glue all the small squares to your template.
Step 7) Use your favourite paint or colours to paint a design.
Step 8) Use two colours on the outer squares to paint a frame.
Step 9) The bigger the template, the more complicated the design can be.
Fun Fact: Roman mosaics were very intricate and have scenes of their day to day lives or their gods.
Join us online every Friday until 3rd September for a new family activity you can try at home!
We’re also welcoming visitors back to the Museum with our FREE Make & Take workshops this summer, booking essential! See our future dates and booking details below:
Step 1) Print the templates or make your own drawings. Make a big piece that is able to hold the rest!!
Step 2) Cut all your pieces (Ask an adult for help!)
Step 3) Colour your pieces with your favourite colours!!
Step 4) Glue the pieces to the cardboard and cut them. (Ask for help!)
Step 5) Take the big piece and make 4 holes on each of the corners. You can use a pencil for this!
Step 6) Cut 4 pieces of string more or less the same size. Pass them through the holes and tie them.
Step 7) Take the four strands, pull them up together and tie them. Make sure the piece is laying flat on the surface you are working on.
Step 8) Make a smaller knot an inch away from the first one. This will be the hole for hanging your craft!
Step 9) Leave this piece aside and take the small ones. Make a hole at the top of each piece.
Step 10) Cut some string, pass it through the holes and tie it. They can be different lengths!!
Step 11) Take the big piece and decide where you want each of your small pieces to go. Make holes, pass the strings through and tie them.
Step 12) Leave the back of the small pieces blank, paint them or duplicate the front image.
Step 13) Go hang it in the garden or in your room!!
Fun Fact: During the Stone Age, people painted animals and hunting scenes on the walls of the caves they lived in. They are all over the world!!
Join us online every Friday until 3rd September for a new family activity you can try at home!
We’re also welcoming visitors back to the Museum with our FREE Make & Take workshops this summer, booking essential! See our future dates and booking details below:
Step 1) Download and print the template or draw your own headdress on an A4 paper.
Step 2) Glue your template to the cereal box and cut around it
Step 3) You can use the leftover piece to make the sides longer. Glue them and draw the same lined pattern.
Step 4) Colour in your headdress using alternating colours. Usually they are royal blue and gold/yellow.
Step 5) Leave the forehead strip empty to add your name. You can do it using the Egyptian alphabet!
Step 6) Use the scissors to make a hole an inch away from the border. (Ask an adult for help!)
Step 7) Measure a piece of elastic long enough to go around your head. Pass the elastic through the hole and tie it. Make sure the knot will not go through the hole and that the mask doesn’t fall!
Step 8) Add any accessories you like!
Step 9) …Voila! Be creative!
Fun Fact: This type of headdress was only used on special ceremonies and funerals.
Join us online every Friday from 30th July to 3rd September for a new family activity you can try at home!
We’re also welcoming visitors back to the Museum with our FREE Make & Take workshops this summer, booking essential! See our future dates and booking details below:
After hearing about our new displays in the previous blogpost, we thought you might like to know a bit more about how we look after our collections.
We have a very varied range of collections from natural history to fine art, archaeology to costume and almost everything you can think of in between.
Hippo skull, 1800s
Pocket watches, 1700s
Hebden Hoard, Roman coins
To make sure our objects can be enjoyed for as long as possible we have to keep a check on the environment we keep and display them in.
We were delighted to obtain a grant recently from Museum Development Yorkshire to purchase new WiFi digital monitoring equipment to help us do this exact task.
EasyLog WiFi datalogger to measure temperature and relative humidity
With these digital monitors we will be able to track the temperature of the air in the cases and in our stores so we know the temperature of the environment that the objects are in.
We can also measure the amount of moisture that the air can hold at that temperature. This is called relative humidity (RH).
The two measurements are linked, as warmer air can ‘hold’ more moisture than cooler air. We want both of these measurements to remain as stable as possible to prevent any damage to the objects.
We will be training our staff and volunteers in what changes to look out for using the new monitors.
How do we monitor the collections environment?
For mixed collections like ours we normally aim for around 18-20 ˚C and 50% RH. Some collection items need a lower RH level than this. We can use separate boxes, cupboards and display cases with absorbent silica gel to create ‘microclimates’ for these items, like Shakespeare’s First Folio, which has its own conditioned case.
Shakespeare’s First Folio, 1623
If it gets too cold and damp, metal items like our lead mining tools would develop rust. Mould might grow on the leather items.
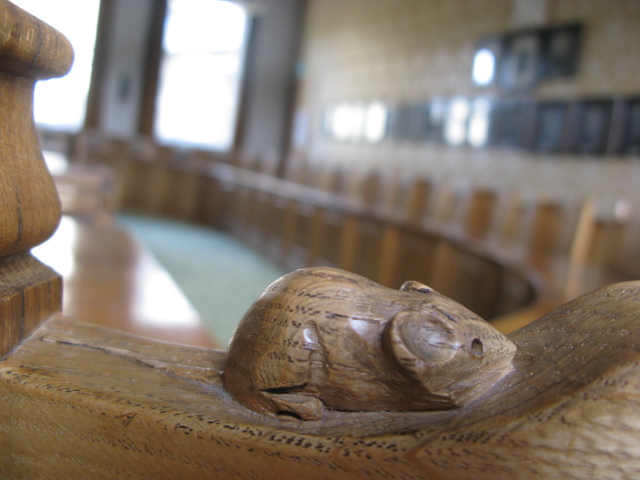
If it’s too warm and dry, wooden objects like the Robert ‘Mouseman’ Thompson furniture might shrink and crack.
A Mouseman carving in the Council Chamber at Skipton Town Hall
High temperatures and damp air together can also encourage insect pests like carpet beetles, clothes moths and silverfish to breed. They can cause damage to lots of different types of objects, like silk and wool items and even the glues in things like books and furniture. We definitely want to avoid these pests.
Silk wedding dress, 1944
So you can see why it’s important to get the display and store environments just right!
What does this enable us to do better?
Our new monitors will mean we can track our cases and storage areas in real time. Alarms and graphs will let us know if there’s a rise or fall in temperature and relative humidity outside the boundaries we set.
Having a good idea of the environmental conditions in the cases will also help us share fragile and special objects like the 2,000 year old Flasby Sword which has an iron blade inside a copper alloy scabbard. It is a very difficult object to get the environmental conditions right for as it needs a low RH to prevent the iron blade rusting further.
Detail of the Iron Age Flasby Sword
If we find out there’s an environmental problem in the cases or in the stores through our monitoring, we can often use simple solutions such as adjusting the heating or using moisture absorbing products like silica gel. That’s why it’s good to find out about an issue early on before it causes damage to an object.
Monitoring the environment might not be something you ever think about when you visit a museum, but behind the scenes work like this is vital to help our objects survive to be enjoyed into the future.
Step 1: If you have ready-made clay, you can skip to step 3. Measure out one cup of flour and half a cup of salt. Slowly add warm water and mix together to make a firm dough.
Step 2: Knead the dough out on a lightly floured surface until smooth
Step 3: Separate your dough into 4 balls, add the food colouring and mix well.
Step 4: Divide each ball into 6 smaller balls.
Step 5: Arrange 5 small balls around one central ball to look like a flower. Press them together to stick them to each other.
Step 6: Insert the stick on the lower side of the flower to make a hole and remove it.
Step 7: If you are using shop-bought clay, follow the instructions on the packaging. For the salt-dough, place your flowers into the oven- ask an adult for help with this! Set to very low heat (120 C) for approximately 2 hours or until hard (keep a close eye on them over this time).
Step 8: Decorate them with paint if you don’t have food colouring. Insert the stick back in the hole and glue it if you like.
Step 9: Now you have a lovely bouquet of Spring flowers!!
Fun Fact: The most popular flower for Easter is the Lilly and it symbolizes virtue, hope and innocence.
This week’s blog has been written by our new University Placement Student Daniela. Read on to find out more about her placement……
I have been taking part of my Forensic Archaeology and Anthropology degree placement year with Craven Museum since February.
As the museum is still closed, I have been working mostly remotely, but this does not mean there is not much to do! On the contrary, I have been involved in a series of different tasks from different projects.
I have been taking part in data checking on accession cards and working with the accession register. This involved checking a list of provided data against the records on the accession register, and as the materials are in storage, it has mainly consisted of reading the data and checking they have the correct numbers and descriptions in the museum database. It has been a long task, but very interesting, given that some objects in the database have pictures and, even though I could not see them live, I could look at them through the register pictures.
I have also worked on typing the different stories from the people that helped to create the bunting for the new Celebration exhibition. Some of them really caught my attention: One of the bunting flags was made by 3 generations of women (grandmother, mother and grandchild), another told the story of a lady remembering her childhood in town, and another told how this little project made them forget about the current situation for a couple of days. They were all celebrating and appreciating the museum, their town and their history. I cannot wait to see the exhibition when the museum opens!!
Besides all these, my main project at the moment is creating an inventory and organising a series of new lithic materials donated by the Kingsdale Head excavation for future handling sessions.
This job consists of analysing every individual piece, making an inventory with numbers and descriptions of them and taking pictures. Considering that these items are going to be used for handling sessions with children and adults, I am working on potentially creating workshops on how they were produced and how they evolved and changed through time (more on this in a later post!!).
Working with the museum’s team has provided me with an insight of what their job involves on a daily basis, and the different skills one can develop in such a rich environment. I have also gained experience on the rich heritage and culture of the region.
We have a behind the scenes blogpost for you this week with a glimpse into the new stores and displays at Craven Museum!
When the museum team moved the collection out for the refurbishment of Craven Museum at Skipton Town Hall in December 2018 we had to pack up the museum’s entire collection of around 60,000 objects. You can read about how we did it on the blog here.
We are now at the exciting stage of bringing all the objects back to make our new displays and put into our new stores.
2018 The packing up…
2021 The unpacking!
We are having our objects mounted for display by specialist mount makers, Rutherford and Wheeler.
Collared Urn pieces, Elbolton Cave, Bronze Age
Some large items need scaffolding to get them into position!
We are really enjoying seeing the display cases come to life with favourite objects from the old museum as well as new objects that we are collecting from the wider community in Craven.
In the stores we have new moveable shelving which means everything now has a place and we can fit more in!
And when we re-open later this year we hope to run bookable store tours so you too can see behind the scenes!


